In Gardeners World episode 1 2015, with spring just around the corner, the program is back for a new series. As usual, Monty Don will be at Longmeadow sharing a wealth of tips and ideas on how to keep your garden looking good all year long. In this episode, he tackles some urgent pruning and reveals some of the projects he’s got in store over the coming months. In the inaugural episode of the 2015 season of “Gardeners World,” the renowned gardening program makes a highly anticipated return just as spring is emerging. As always, the show provides viewers with invaluable insights and inspirations on maintaining a thriving garden throughout the year, regardless of season.
Anchoring the series is the esteemed horticulturist Monty Don, who broadcasts directly from his beautiful garden at Longmeadow. Monty’s wealth of experience, combined with his genuine passion for plants and the outdoors, makes him an ideal guide for both novice gardeners and seasoned green thumbs alike. His practical tips, detailed demonstrations, and creative ideas serve to inspire and educate, enabling viewers to cultivate gardens that not only look good but also contribute to local biodiversity.
This episode sets the stage for the season by focusing on urgent springtime gardening tasks, especially pruning. Pruning is an essential part of plant care that not only keeps plants healthy and tidy but also encourages growth and blooming. Monty carefully explains the art of pruning, including when and how to do it, ensuring that even the most novice gardener feels confident in tackling this task.
This year, Carol Klein will be visiting some of the nation’s greatest gardens to find out why their beautiful borders work so well. Her tour starts at RHS Wisley in Surrey, where she takes a closer look at their glorious winter garden. Joe Swift has the first of his three design masterclasses on how to make the most of a small town garden. And we travel to the Cape in South Africa to learn more about the geraniums we love to grow in our pots and hanging baskets.
Gardeners World episode 1 2015:
Hedges
Hedges are a great way to add beauty and privacy to your garden. They can also provide shade, shelter, and habitat for wildlife. But hedges need regular care and maintenance to keep them healthy and attractive. Here are some tips on how to garden with hedges.
- Choose the right hedge for your location and purpose. There are many types of hedges, from evergreen to deciduous, from flowering to fruiting, from formal to informal. Consider the size, shape, color, and texture of the hedge you want, as well as the soil, sun, and water conditions of your site. You may also want to think about the function of the hedge, such as screening, noise reduction, windbreak, or boundary marker.
- Plant your hedge at the right time and spacing. The best time to plant hedges is in early spring or fall, when the weather is cool and moist. Avoid planting in summer or winter, when the plants may suffer from heat or cold stress. Dig a trench or individual holes that are twice as wide and as deep as the root ball of the hedge plants. Space the plants according to their mature width, leaving enough room for air circulation and pruning. Water the plants well after planting and mulch the soil around them to conserve moisture and prevent weeds.
- Prune your hedge regularly and properly. Pruning is essential for keeping your hedge in shape and promoting healthy growth. The frequency and method of pruning depend on the type and style of your hedge. Generally, you should prune evergreen hedges once or twice a year, in late winter or early spring and again in midsummer. Deciduous hedges should be pruned once a year, in late winter or early spring before new growth starts. Use sharp and clean tools to make clean cuts at an angle just above a bud or branch. Avoid cutting too much or too little at a time, as this may damage or weaken the plants.
- Fertilize and water your hedge as needed. Hedges need regular feeding and watering to thrive and resist pests and diseases. Apply a balanced fertilizer in spring and again in midsummer, following the label instructions. Water your hedge deeply and thoroughly once a week or more often during dry spells. Avoid overwatering or underwatering, as this may cause root rot or drought stress.
Enjoy your hedge! Hedges are a wonderful addition to any garden, providing beauty, privacy, and benefits for wildlife. With proper care and maintenance, you can enjoy your hedge for years to come.
Apples and pears: pruning made easy
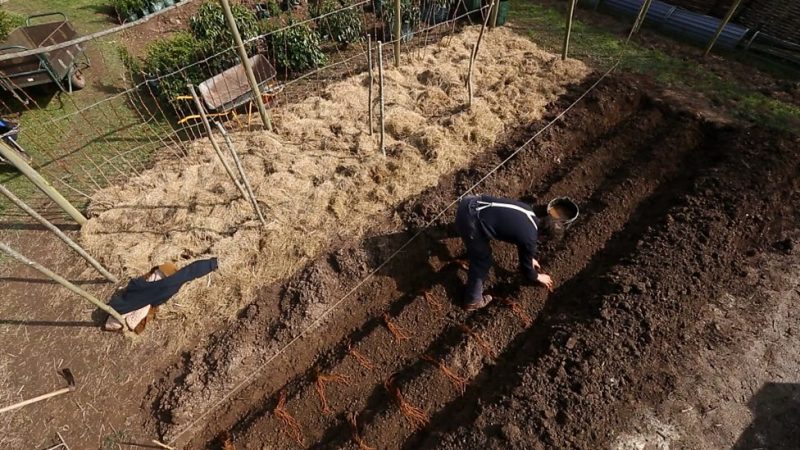
Pruning an apple or pear tree can be daunting for many gardeners. Rather than be put off completely or panic and inadvertently harm the tree back by excessive pruning, instead try our easy guide and enjoy a well-shaped, productive tree. Pruning is an essential part of maintaining healthy and productive apple and pear trees. Pruning helps to shape the tree, remove dead or diseased branches, improve air circulation and light penetration, and stimulate new growth. The process of pruning also affects the quantity and quality of the fruit, as well as the timing of the harvest.
There are two main types of pruning: formative and routine. Formative pruning is done in the first few years of the tree’s life to establish a strong and balanced framework of branches. Routine pruning is done annually after the tree has reached maturity to maintain its shape and health.
Formative pruning should be done in late winter or early spring, before the buds break. The aim is to create an open-centred or vase-shaped tree with a clear trunk and four to six main branches. This allows light and air to reach the centre of the tree and reduces the risk of pests and diseases. The main steps of formative pruning are:
- Cut back the leader (the main stem) to about 75 cm above the ground at planting.
- Select four to six well-spaced branches that are growing at a wide angle from the leader and cut them back by a third to a bud facing outwards.
- Remove any other branches that are crossing, rubbing, weak, or growing vertically or downwards.
- Repeat this process every year until the desired framework is achieved.
Routine pruning should be done in late summer or early autumn, after the fruit has been harvested. The aim is to remove any excess growth that may reduce the fruiting potential of the tree. The main steps of routine pruning are:
- Cut back any new shoots that have grown from the main branches by about half to a bud facing outwards.
- Remove any dead, diseased, damaged, or crowded branches that may affect the health or shape of the tree.
- Thin out any spurs (short branches that bear fruit) that are too close together or too old to produce good quality fruit.
- Remove any suckers (shoots that grow from the base of the trunk or the roots) as they may take energy away from the tree.
Pruning apple and pear trees is not difficult if you follow some basic principles and use sharp and clean tools. Pruning can also be a rewarding and enjoyable activity that will benefit both you and your trees for years to come.
Fruit: storing – Gardeners World episode 1 2015
If handled carefully and placed in the right environment, fruit from your garden may be stored for several weeks, or even months. So, with a little planning, you could be eating your own apples at Christmas. Fruit storing is an important skill for anyone who loves fresh and healthy fruits. Fruits are rich in vitamins, antioxidants and fiber, but they can also spoil quickly if not stored properly. Here are some tips on how to store different types of fruits and extend their shelf life.
- Apples: Apples can last for several weeks if stored in a cool and dark place, such as a refrigerator or a cellar. Avoid placing them near other fruits, as apples release ethylene gas that can speed up ripening and rotting.
- Bananas: Bananas ripen quickly at room temperature, but you can slow down the process by separating them from the bunch and wrapping the stems with plastic wrap. You can also peel and freeze ripe bananas for later use in smoothies or baking.
- Berries: Berries are delicate and prone to mold, so they should be stored in the refrigerator in a single layer on a paper towel-lined tray. Do not wash them until you are ready to eat them, as moisture can cause them to deteriorate faster.
- Citrus fruits: Citrus fruits such as oranges, lemons and grapefruits can last for a long time at room temperature, but they will stay fresher and juicier in the refrigerator. You can also freeze the juice or zest of citrus fruits for later use.
- Melons: Melons such as watermelon, cantaloupe and honeydew can be stored at room temperature until they are ripe, then moved to the refrigerator. Cut melons should be wrapped tightly with plastic wrap or stored in an airtight container to prevent them from drying out or absorbing odors.
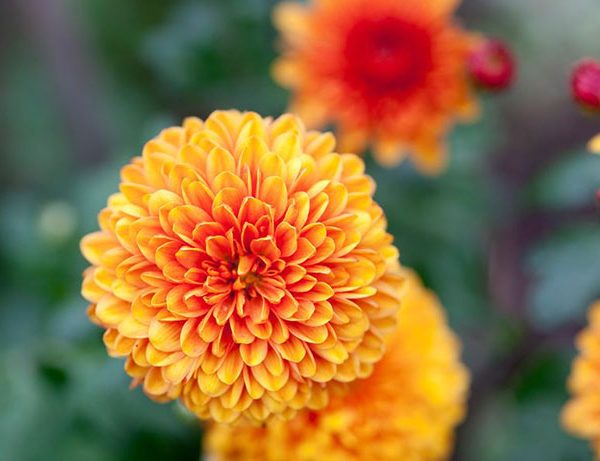
Growing pelargoniums (geranium) – Gardeners World episode 1 2015
Pelargoniums, commonly known as geraniums, are a large, diverse group of mostly evergreen and tender plants used as bedding or houseplants. Although pelargoniums are often called geraniums, this is not correct, as the true geraniums are hardy herbaceous plants. Pelargoniums, commonly known as geraniums, are a large and diverse group of plants that can brighten up any garden with their colorful flowers and aromatic foliage. They are easy to grow and care for, and can be propagated from cuttings or seeds. In this blog post, I will share some tips and tricks on how to grow pelargoniums successfully in your own backyard.
First of all, you need to choose the right variety of pelargonium for your climate and preference. There are many types of pelargoniums, such as zonal, ivy, regal, scented, angel, and unique. Each type has its own characteristics and needs, so do some research before buying or planting them. Some general guidelines are:
- Zonal pelargoniums are the most common and popular type, with round leaves and clusters of flowers in various colors. They are ideal for sunny locations and can tolerate some frost.
- Ivy pelargoniums have trailing stems and glossy leaves that resemble ivy. They produce single or double flowers in shades of pink, purple, red, or white. They are perfect for hanging baskets or containers, and prefer partial shade and moist soil.
- Regal pelargoniums have large and showy flowers that look like roses or orchids. They come in a range of colors and patterns, often with contrasting markings on the petals. They are more sensitive to cold and need protection from frost and wind. They also require well-drained soil and regular feeding.
- Scented pelargoniums have fragrant leaves that emit different scents when touched or crushed. Some common scents are lemon, rose, mint, apple, and chocolate. They have small and delicate flowers that are usually white or pink. They are suitable for pots or borders, and enjoy full sun and dry soil.
- Angel pelargoniums have small and dainty flowers that resemble pansies. They have a wide variety of colors and patterns, often with dark blotches on the lower petals. They are more cold-hardy than regal pelargoniums and can tolerate light frost. They prefer partial shade and moist soil.
- Unique pelargoniums are rare and unusual varieties that do not fit into any of the above categories. They have distinctive features such as variegated leaves, double flowers, or unusual shapes. They are collectors’ items and may be hard to find or expensive.
Once you have chosen your pelargoniums, you need to plant them in a suitable location and container. Pelargoniums like well-drained soil that is rich in organic matter. You can use a commercial potting mix or make your own by mixing equal parts of compost, perlite, and peat moss. You can also add some slow-release fertilizer to the soil to boost the growth and flowering of your plants.
Pelargoniums need at least six hours of direct sunlight per day to thrive. However, some types may need some shade during the hottest part of the day to prevent sunburn or wilting. You can place your pots or containers in a sunny spot that has some afternoon shade, such as under a tree or a pergola. Alternatively, you can move your pots around according to the season and the weather.
Pelargoniums also need regular watering and feeding to keep them healthy and happy. You should water your plants when the top inch of the soil feels dry to the touch, but avoid overwatering or letting the soil get soggy. You can check the moisture level by inserting your finger into the soil or using a moisture meter. Also feed your plants every two weeks during the growing season with a balanced liquid fertilizer diluted to half strength.
Pelargoniums are relatively pest- and disease-free plants, but they may occasionally suffer from some problems such as aphids, whiteflies, spider mites, fungal diseases, or root rot. You can prevent most of these issues by keeping your plants clean and healthy, avoiding overwatering or overcrowding them, and inspecting them regularly for signs of trouble. You can also use organic methods such as spraying with insecticidal soap or neem oil to control pests or diseases.
One of the best things about pelargoniums is that they are easy to propagate from cuttings or seeds. You can take cuttings from healthy stems in spring or summer, remove the lower leaves and flowers, dip the cut end in rooting hormone powder (optional), and insert it into moist potting mix. You can cover the pot with a plastic bag or a dome to create a humid environment for the cutting to root. Keep the pot in a warm and bright place (but not direct sun), water it lightly when