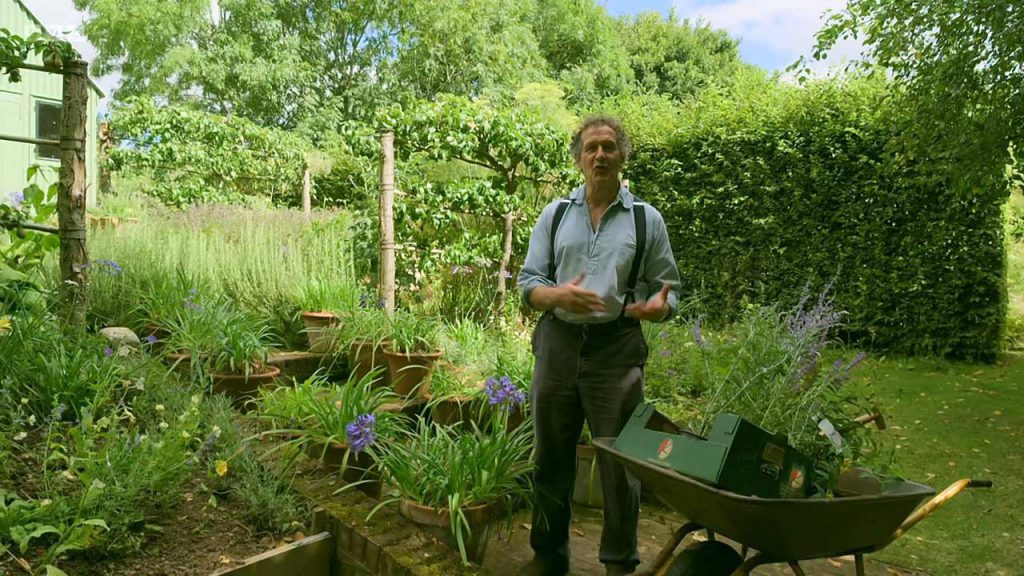
Gardeners World 2023 episode 11 – Monty Don, with an artistic flair for gardening, masterfully crafts radiant and vibrant planting schemes. He puts a unique emphasis on trailing plants, integrating them into his designs in a way that not only showcases their beauty but also heightens the overall visual effect of the garden space. Not limiting his expertise to decorative horticulture, he further delves into the realm of edible plants. Specifically, he demonstrates his prowess in planting out cabbages in the meticulously planned vegetable garden. Additionally, he generously imparts an ingenious piece of advice on managing your tulips after their blooming period, adding to his repertoire of useful gardening tips.
On the other hand, Toby Buckland finds immense joy in the extraordinary displays of roses that grace the scenic Mount Ephraim Gardens located in Kent. Their beauty is unparalleled, a sight that would leave any nature lover spellbound. His journey also includes a return visit to the enchanting Linn Botanic Gardens tucked away in Argyll and Bute. There, he meets with owner Matthew Young, who receives some wise counsel regarding the precious and rare trees that make up his extraordinary collection. This advice, coming from experienced minds, is sure to help him in maintaining and even enhancing this natural treasure.
Meanwhile, Carol Klein embarks on a visit to a bustling nursery. This nursery has undertaken the massive task of nurturing thousands of plants intended for her show garden at the prestigious RHS Hampton Court Palace Garden Festival. These hand-picked specimens are being cultivated with utmost care, poised to become the star attractions of the show.
In Warwickshire, Sue Kent sets out on an intriguing expedition to the Heritage Seed Library, a place that preserves agricultural history through its collection of heirloom vegetable varieties. Sue discovers these varieties are not only easy to cultivate and harvest but also carry a wealth of genetic diversity and history. She explores this vast library, understanding the importance of such a collection in preserving biodiversity. Lastly, there’s a houseplant enthusiast, a dedicated lover of indoor flora, who has ingeniously transformed her living room into a verdant indoor garden. Her passion for plants is palpable as she manages to create a miniature oasis right within her home, showcasing the limitless possibilities of indoor gardening.
Gardeners World 2023 episode 11 – Unraveling the Beauty of Trailing Plants: Your Complete Guide
Trailing Plants Unveiled: An Overview
Trailing plants, with their cascading tendrils and verdant leaves, are a marvel to behold. Their ability to add a touch of drama and wilderness to any space is unparalleled. They’re nature’s own decorators, twining around trellises, spilling over containers, and adorning walls with their intricate patterns of foliage and flowers.
These plants, also known as hanging or trailing plants, are named for their unique growth habit. They trail down, mimicking a waterfall’s flow, or they climb upwards, seeking the sun’s embrace. In the wild, you’ll often find them scaling trees and cliff faces, displaying their tenacity and adaptive capabilities.
Among the myriad varieties of trailing plants are the pothos with its heart-shaped leaves, the delicate tendrils of English ivy, and the vibrant blooms of trailing petunias. Each species offers a unique aesthetic, making them versatile elements in landscape and interior design.
Naming the Trailing Beauties: What Are They Called?
Have you ever found yourself entranced by a hanging plant at a friend’s home or in a garden, but didn’t know what to call it? The world of trailing plants is vast and varied, with a plethora of species to explore.
Commonly, these plants are referred to as ‘hanging’ or ‘trailing’ plants. However, specific species have their own names. For example, the Philodendron hederaceum is commonly known as the ‘heartleaf philodendron,’ thanks to its heart-shaped leaves. Meanwhile, the ever-popular Ficus pumila goes by ‘creeping fig.’
Yet, there’s more to the nomenclature of these plants than just their common names. Horticulturists and plant enthusiasts often refer to trailing plants as ‘spillers’ in the context of container gardens. As the name suggests, spillers are plants that spill over the edge of the pot, creating a lovely overflowing effect.
The Best Trailing Plants for Hanging: Top Picks
If you’re looking to add a dash of natural beauty to your home or garden, trailing plants are an excellent choice. Their hanging habit creates an instant focal point, transforming even the most ordinary spaces into lush green sanctuaries.
One of the top picks for hanging plants is the String of Pearls (Senecio rowleyanus). With its round, bead-like leaves and trailing stems, this plant is a real eye-catcher. It’s perfect for indoor hanging baskets and does well in bright, indirect light.
If you’re after a hardier option, consider the Golden Pothos (Epipremnum aureum). This plant is not just attractive with its variegated leaves, but it’s also known for its air-purifying qualities and low-maintenance nature. Finally, for a burst of color, there’s nothing quite like the Trailing Geranium (Pelargonium peltatum). Its vibrant flowers contrast beautifully with its green leaves, making it a favorite for outdoor hanging baskets.

Perfect Spots to Hang Trailing Plants
Choosing the right spot to hang your trailing plants is as crucial as selecting the plant itself. The location can significantly influence the plant’s health and growth, and therefore, its overall appearance.
One popular choice is hanging plants near windows. They benefit from the natural light, and their cascading foliage can create a stunning visual effect. However, be mindful of the plant’s light requirements. Some trailing plants prefer indirect light and may get scorched in direct sunlight.
Outdoor spaces like patios, balconies, and garden walls are also excellent spots. The trailing plants add an element of lushness and color, enhancing the overall ambiance. Hanging them at different levels can create a layered look, adding depth and interest to your outdoor area.
Lastly, don’t overlook unconventional spaces like the bathroom. Many trailing plants thrive in the humidity, making the bathroom a perfect home. Imagine a cascade of greenery above your bath, turning your bathroom into a mini rainforest retreat!
Trailing vs. Spiller Plants: The Difference Explained
In the world of horticulture, you might have come across the terms “trailing” and “spiller” plants. While they might seem interchangeable at first, there’s a subtle difference between the two. Trailing plants naturally grow downwards, their stems reaching out and trailing over the edge of their containers. They’re often used in hanging baskets due to their beautiful draping effect.
On the other hand, the term “spiller” is used more broadly in container gardening. Spiller plants can be any plant – not just trailing ones – that grows over the edge of the pot, creating a cascading effect. They’re one component of the classic “thriller, filler, spiller” container garden design, where the “spiller” softens the edges and adds a dynamic element to the arrangement.
Can Any Plant Become a Hanging Charm?
While it’s true that many plants can adapt to hanging conditions, not all plants are suitable for this purpose. Some plants naturally grow upwards or outwards, and forcing them to hang can stress the plant and inhibit its growth.
However, many trailing plants naturally grow downwards and are well-suited to hanging baskets. They’ll happily grow towards the ground, creating a beautiful waterfall effect. Some of these include the English Ivy, Creeping Jenny, and Spider Plant. It’s crucial to consider the plant’s natural growth habit and care requirements before deciding to hang them. With the right choice, you can create a stunning display that adds life and color to any space.
Winter-Proof Hanging Plants: Keeping Green in the Cold
When winter sets in, it’s not just humans who need to stay warm and cozy. Plants, too, need extra care to survive the freezing temperatures. But, don’t let the cold weather deter you from keeping your green companions. There are several trailing plants that can withstand winter’s harsh conditions.
English Ivy (Hedera helix) is a classic choice for a winter-resistant trailing plant. Its hardy nature and tolerance for lower temperatures make it an excellent pick for colder climates. Besides, its evergreen leaves add a much-needed splash of green in the midst of a white winter.Another excellent option is the Winter Jasmine (Jasminum nudiflorum). True to its name, this plant not only survives in winter but also blooms during this time, providing bright yellow flowers to cheer up the cold days.
When choosing hanging plants for winter, it’s essential to consider their light requirements. Winter days are shorter, and the lack of sunlight can affect a plant’s health. Therefore, opt for plants that can tolerate low-light conditions during this period.
Care Tips for Hanging Plants: Watering and Beyond
The allure of trailing plants often lies in their low-maintenance nature. However, this doesn’t mean they can be entirely left to their own devices. Regular care is essential to keep them healthy and thriving.
Watering is a key aspect of plant care, and hanging plants are no exception. Despite their elevated location, these plants need regular watering. But be careful not to overwater, as this can lead to root rot. The frequency of watering will depend on the plant species and the environment. For instance, indoor plants generally need less frequent watering than outdoor ones.Another important aspect of care is pruning. Regularly trimming your trailing plants helps maintain their shape and encourages bushier growth. It’s also an opportunity to remove any diseased or dead parts of the plant, keeping it healthy.
Finally, pay attention to the plant’s light and temperature needs. Different trailing plants have different preferences. Some might prefer a sunny window, while others might thrive in the indirect light of a shaded corner. By catering to these needs, you can ensure your trailing plants continue to enhance your space with their beauty.
Gardeners World 2023 episode 11 – How to Cultivate Cabbages – An In-Depth Guide for Successful Growth
Choosing the Best Cabbage Varieties for Your Garden
Choosing the right variety of cabbages is essential for a fruitful harvest. Cabbage cultivators should be knowledgeable about the distinctive growing conditions and characteristics of spring, summer, autumn, and winter cabbages. A member of the Cole crop family, cabbages excel in cooler climates, making them ideal for cool-season gardening.
The variety you select will significantly impact the outcome of your cabbage farming venture. If you’re a beginner, opt for disease-resistant and high-yielding varieties that can compensate for common beginner errors. Thoroughly investigate the optimal cabbage varieties for your region before planting, considering their specific growing conditions, ideal harvest times, and preferred pH levels.
Renowned varieties such as Savoy, Early Jersey Wakefield, and Red Acre offer unique growing conditions, though the fundamental principles of cabbage cultivation remain constant across varieties. A well-informed choice brings you closer to uninterrupted cabbage growth and a plentiful harvest.
Ground Preparation for Cabbage Planting
Ground preparation is a fundamental step in cabbage farming. Cabbages require nutrient-rich soil for steady growth. The soil’s pH should be neutral or slightly acidic, typically between 6.0 and 6.8. You can enrich the soil and enhance its structure by adding organic materials such as compost or well-decomposed manure, which improves water retention and drainage.
Ground preparation involves consistent tilling to break down clumps, aiding the cabbage plants in establishing their roots. Regular tilling also aerates the soil, facilitating root growth. Proper soil preparation paves the way for uniform growth and a healthier, more abundant harvest.
If you are unable to plant cabbages directly into the ground, container gardening is an excellent alternative. With containers like pots or grow bags, you can regulate soil conditions closely and still achieve a successful albeit smaller crop. As long as the containers have proper drainage and sufficient space for cabbage growth, this method can be particularly effective for urban gardens or limited spaces.
Planting Cabbage Seeds and Transplanting Seedlings
Cabbage seeds can be sown directly in the garden or started indoors as seedlings and transplanted later. Direct seed sowing should be timed according to the preferred growing season of the cabbage variety, usually four to six weeks before the last spring frost. To promote growth, sow seeds ¼-inch deep and keep the soil moist.
For those starting with seedlings, transplant them outdoors when they have developed three to four true leaves and are at least four weeks old. Ensure the temperature, light, and moisture levels are suitable for the chosen cabbage variety. When transplanting, aim for a spacing of 12 to 24 inches apart, depending on the variety and its mature size, to avoid overcrowding and competition that could lead to disease and pest issues.
Since cabbage roots are shallow, handle them gently during transplanting to prevent root damage. Firm the soil around the seedlings and water them thoroughly after transplanting to help them settle into the new environment. Protect young seedlings from harsh weather, pests, and diseases by managing their environment appropriately, using tools such as insect netting or crop covers if necessary.
Delivering Essential Nutrition and Soil Enrichment
As heavy feeders, cabbage plants demand efficient fertilization to sustain their growth and reach their maximum potential. A slow-release fertilizer, rich in nitrogen, phosphorus, and potassium, is ideal for cabbages. Nitrogen encourages leafy growth, while phosphorus and potassium help build robust roots and enhance overall plant health. However, too much of any one nutrient, particularly nitrogen, can result in excessive leaf growth at the expense of the cabbage head.
Incorporate compost and other organic matter like aged manure to deliver essential nutrients throughout the season and improve soil structure. These materials should be integrated into the soil during the pre-planting phase and can be added as a side dressing during the growth period to supplement the initial fertilization nutrients.
The optimal fertilization and soil enrichment plan depends on your specific soil needs and cabbage variety. Test your soil for nutrient content before planting to ensure you’re supplying the correct type and quantity of fertilizer. Insufficient fertilization can lead to weak plants and poor yields, so select an appropriate fertilizer and apply it as required to maintain healthy, thriving plants.
Providing Adequate Water and Sunlight for Cabbage Growth
Water is essential for cabbage growth as they require consistent hydration. Cabbages typically need about 1 to 1.5 inches of water per week. Applying a layer of organic mulch can help preserve soil moisture, regulate soil temperature, and suppress weed growth. Overwatering can cause root rot and other diseases, so avoid it. Cabbages grown in containers might require more frequent watering due to quicker evaporation.
Most cabbage varieties require at least six hours of full sun daily. Some can tolerate partial shade, but this may result in smaller heads and slower growth. Make sure your planting location gets ample sunlight without any obstructions during peak hours. Careful monitoring and adjusting your plants’ exposure to sunlight is crucial for achieving the best cabbage yields.
In regions with extreme heat, consider protecting your cabbage plants from the intense sun during the hottest months by using some shade cloth. This precaution prevents premature bolting and ensures the production of healthy, well-formed heads. As cool-season crops, cabbages grow better in cooler temperatures, so shielding them from excessive heat is essential for successful growth.
Safeguarding Cabbages from Pests and Diseases
Cabbage plants are susceptible to specific pests and diseases that can negatively affect their growth and quality. Common pests such as cabbage loopers, aphids, and cabbage worms can cause considerable damage to your crops. Protect your cabbages from these harmful insects by employing organic or chemical insecticides, installing insect netting, or introducing beneficial insects like ladybugs to your garden.
Diseases like clubroot, black rot, and downy mildew also require proactive management. Opt for disease-resistant varieties and practice proper crop rotation, as planting cabbages repeatedly in the same area can lead to pathogen buildup. Giving your plants sufficient space aids in air circulation, thereby minimizing disease spread.
Regular inspection and monitoring of your cabbage plants can help address any signs of pest infestation or disease promptly. Early intervention can significantly improve your cabbage farming success, so remain vigilant and safeguard your garden. A well-protected cabbage patch will yield healthier, more abundant crops.
Harvesting Your Cabbage Plants
The ideal harvesting time for cabbages varies depending on the variety and growing conditions. Typically, cabbages are ready for harvest when the heads feel solid upon a gentle squeeze. Harvest cabbages as soon as they reach maturity, as waiting too long can cause the heads to crack or split. Harvest your cabbage by cutting it just under the head with a sharp knife.
Early-season varieties are usually ready for harvest 45-50 days post-transplanting, while mid-to-late season cabbages may take up to 95 days. Monitor your cabbages’ progress and keep track of their estimated harvest times based on their variety. Harvest your cabbages when they’re ready, rather than letting them become overly large or overripe, for optimal freshness and quality.
After harvesting, store your cabbages in a cool and slightly moist environment, like a refrigerator or root cellar. Use harvested cabbages within a few weeks. By growing multiple cabbage varieties with differing maturity times, you can enjoy a continuous supply of fresh cabbage throughout the growing season. Stagger your cabbage plantings for an extended harvesting period and to enjoy your homegrown crops over a longer duration.