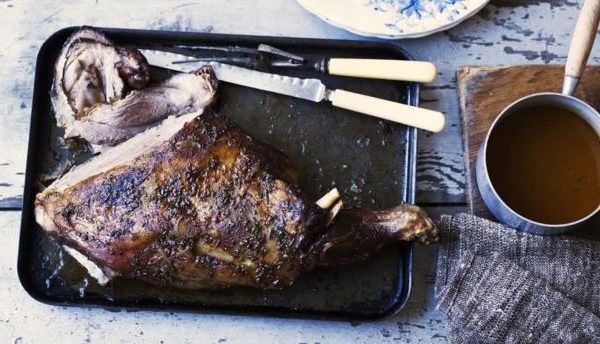
Mary Berry Cooks ep. 1: Mary Berry is in her kitchen at home cooking her favourite food. With her trademark warmth and common sense, she takes viewers step by step through delicious recipes for everyday and special occasions. In this episode of Mary Berry Cooks, the beloved British cook and author invites us to join her in her cozy kitchen at home, where she prepares some of her favorite dishes for different occasions. Whether it’s a family dinner, a Sunday roast, or a festive feast, Mary shows us how to make simple and satisfying meals with her signature warmth and practical tips. She also shares some stories and secrets behind her recipes, and reveals how she balances her busy life with her passion for cooking.
Alternative stream and download
In this series Mary reveals foolproof dishes for Sunday lunch, afternoon tea and weekday suppers. Plus she shares impressive but surprisingly easy recipes for parties and celebrations when there are more mouths to feed. In her calm and capable hands, cooking for guests has never been simpler. This series is all about making cooking easy and enjoyable, whether you are cooking for yourself or for a crowd. Mary shows you how to prepare delicious dishes for every occasion, from a cozy Sunday lunch to a festive party. She shares her secrets for making mouthwatering meals that everyone will love, without spending hours in the kitchen. You will learn how to make classic roast dinners, scrumptious cakes, comforting soups and more. Mary also gives you tips and tricks for saving time and money, and for making the most of your ingredients. With Mary’s guidance, you will be able to impress your guests and treat yourself with simple but satisfying recipes.
In the opening episode, Mary shows how to host a traditional tea party without any fuss. She shares a clever trick for making sandwiches in advance. She bakes bite-sized scones for a cream tea, and her granddaughters help her make orange butterfly cakes. Mary also visits Britain’s only tea plantation in Cornwall to find out how tea is grown.
Mary Berry Cooks ep. 1 Afternoon Tea recipes:
1. Chocolate traybake with feather icing
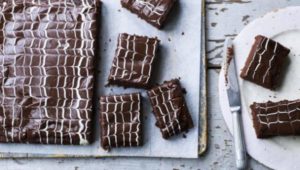
A chocolate sponge topped with a milk chocolate icing feathered with white chocolate makes this a great cake to share for a birthday party for the young as they love milk chocolate. Decorate it as you like – try topping it with sweets, chopped chocolate bars, marshmallows or lots and lots of candles! If it’s for a more sophisticated occasion use about 40% cocoa solids dark chocolate. If you’re looking for a simple and delicious dessert to impress your guests, look no further than this chocolate traybake with feather icing. This recipe is easy to make and requires only a few ingredients. You can customize the flavor of the icing by adding different extracts or food coloring. The feather icing technique creates a beautiful pattern on the cake that looks like it was done by a professional baker. Here’s how to make this chocolate traybake with feather icing.
Method:
- Preheat the oven to 180C/350F/Gas 4 (160C fan).
- Put the cocoa in a large bowl, add the boiling water and mix until smooth. Add the baking spread or butter and beat into the cocoa until smooth, then add the remaining cake ingredients and mix until combined – this can be done in a mixer or by hand.
- Pour into the tin, spread evenly and bake in the preheated oven for about 30-35 minutes, or until well risen, just firm to the touch and shrinking away from the sides of the tin. Leave to cool in the tin for 10 minutes, then turn out and peel off the baking parchment. Brush the top of the cake with apricot jam and leave to cool completely
- For the icing, warm the cream in a small pan until hot, then add the milk chocolate and stir until completely melted and smooth. Leave to cool a little so that it is a thick pouring consistency (this won’t take long depending on room temperature). Pour the icing over the cake, spreading out with a palette knife to cover the cake completely.
- To decorate, melt the white chocolate in a small bowl over a pan of gently simmering water. Place in a small piping bag, snip the end and pipe in lines down the cake, about 1cm/½in apart. Using a cocktail stick, drag through the white chocolate in opposite directions across the cake to give a feathered effect.
2. Orange butterfly cakes

These little fairy cakes are filled with orange curd and topped with icing, and are even nicer than cupcakes.
Method:
- Preheat the oven to 180C/160C Fan/Gas 4.
- Put all the cake ingredients into a large bowl and beat well for 2-3 minutes, or until the mixture is well-blended and smooth. Fill each paper case with about 35g/1¼oz of mixture.
- Bake in the preheated oven for about 15-20 minutes, or until the cakes are well risen and golden-brown. Lift the paper cases out of the bun tin and cool the cakes on a wire rack.
- When cool, cut a disc from the top of each cake leaving a little gap around the edge and cut this slice in half. Spoon half a teaspoonful of orange curd in each.
- To make the icing, beat the butter and icing sugar together until well blended. Pipe or spoon a swirl of buttercream on top of the orange curd and place the half slices of cake on top to resemble butterfly wings. Dust the cakes with icing sugar to finish.
4. Loaf cake with apple and cinnamon
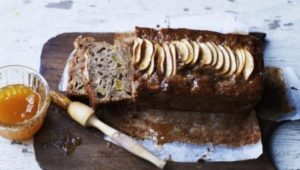
This is a lovely moist loaf which I love to serve sliced and buttered – and it’s very quick and simple to make.
Method:
- Set the oven to 180C/160C Fan/Gas 4.
- Rub the butter into the flour until it resembles fine breadcrumbs (this can be done in a food processor). Stir in the sugar and cinnamon.
- Peel the apples, core and dice two and a half apples and stir into the cake mixture with the eggs. Beat until combined.
- Divide the cake mixture evenly between the cake tins. Thinly slice the remaining half of apple and arrange in a row along the middle on top of each cake. Sprinkle with demerara sugar and bake for 35-45 minutes, or until golden-brown, risen, firm to the touch in the centre and just shrinking from the sides of the tin.
- Brush the top of the cakes with the apricot jam. Allow to cool in the tins for 10 minutes, then turn out and leave to cool on a wire rack.
5. Strawberry jam
Learn how to get perfectly set strawberry jam by following Mary Berry’s simple instructions. You’ll need to pop a couple of plates in the freezer beforehand. If you love strawberries and want to enjoy their sweet flavor all year round, making your own strawberry jam is a great way to do it. In this blog post, I will show you how to make strawberry jam using Mary Berry’s recipe, which is simple and delicious.
Mary Berry is a famous British cook and author, who has written over 70 cookbooks and hosted several TV shows. She is known for her classic and elegant dishes, as well as her expertise in baking. One of her most popular recipes is strawberry jam, which she demonstrates in her show Mary Berry Cooks.
To make strawberry jam, you will need the following ingredients:
– 1 kg (2 lb 4 oz) of fresh strawberries, washed, hulled and dried
– one lemon, juice only
– 1 kg (2 lb 4 oz) of jam sugar
- Jam sugar is a type of sugar that contains pectin, which is a natural substance that helps the jam set. You can find it in most supermarkets or online.
- The first step is to prepare the strawberries. If they are large, cut them in half. Then put them in a large pan with the lemon juice and heat them for a few minutes to soften.
- Next, add the jam sugar and stir over a low heat until it dissolves. Make sure the sugar is completely dissolved before bringing the mixture to a boil. Otherwise, you might end up with grainy jam.
- Once the sugar has dissolved and the liquid is clear, boil the mixture steadily for about 6 minutes, or until it reaches the setting point. The setting point is the temperature at which the jam will thicken and gel when cooled. You can test it by spooning a little bit of jam onto a cold plate, leaving it for a minute, and then pushing it with your finger. If the jam crinkles and separates without flooding back, it is ready.
- If the jam is not ready yet, keep boiling it for another minute or two and test again. Be careful not to overcook it, as it might become too hard or lose its flavor.
- Once the jam is ready, set it aside to cool for 10 minutes. This will help prevent the fruit from sinking to the bottom of the jars. Meanwhile, sterilize your jars and lids by washing them with hot soapy water and rinsing them well. Then dry them in an oven at 100°C (212°F) for 15 minutes or so, until completely dry.
- Finally, spoon the jam into the sterilized jars, leaving some space at the top. Label and seal them with wax paper and a lid. Store them in a cool, dark place for up to a year. Enjoy your homemade strawberry jam on toast, scones, pancakes, or whatever you like!
6. Whole lemon cake with lemon cheesecake icing
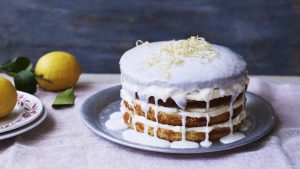
There are three whole lemons used in the cake, icing and decoration so the flavour is incredibly intense and delicious.
Method:
- For the decoration, using a zester, peel long strips of lemon rind. If you haven’t got a zester, thinly peel the lemon, then cut into fine strips. Set aside the remaining lemon.
- Place the peel in a saucepan, cover with boiling water and half the caster sugar and boil for one minute. Drain and pat dry, then put onto non-stick parchment paper. Scatter over the remaining sugar and toss to coat the lemon peel. Arrange on the non-stick baking parchment and leave in a warm place to dry out for as long as possible or overnight, until crisp. If you are in a hurry, dry out in a low oven 110C/225F/Gas ¼ for 30 minutes.
- Cut the zested lemon in half and squeeze the juice. Set it aside to make the icing.
- For the cake, place the two whole (or one large) lemons in a small saucepan, cover with water, bring to the boil and simmer for 20 minutes, or until very soft and tender. Drain, cut the lemons in half and remove any pips.
- Preheat the oven to 180C/350F/Gas 4 (160C fan).
- Place the lemons, including the skin, in a food processor and process until smoothish, but still with some chunky bits. Put the mixture in a small bowl.
- Add all the remaining cake ingredients into the food processor and blend until smooth. Lift out the blade and stir in just over half of the lemon pulp. Set the rest aside.
- Divide the mixture evenly between the two tins and bake for 30 minutes, or until golden-brown and just shrinking from the edge of the tins.
- Leave to cool for five minutes, then turn the cakes out, peel off the baking parchment and leave to finish cooling on a wire rack.
- For the lemon filling, blend the butter and icing sugar in a food processor until smooth and creamy. Add the mascarpone, blend again and then add the lemon pulp and blend until just mixed.
- Cut both cakes in half so that you have four layers. Spread the lemon cream evenly between the layers, stacking them on top of each other.
- Mix the fondant icing sugar with 1-2 tbsp lemon juice (from the lemon used to make the candied zest decoration) to make a thick pouring consistency. Pour the icing over the top of the cake allowing it to drizzle down. Sprinkle the candied lemon rind on top.

