In Gardeners World episode 3 2017, Monty Don embarks on a significant new project—revamping his charming courtyard garden. With his characteristic blend of knowledge and passion, Monty begins by planting bare root trees. These trees, shipped without soil around their roots, are excellent for establishing strong root systems. Monty meticulously explains each step of the process, from selecting the right species to ensuring proper planting techniques. His detailed guidance aims to empower viewers to incorporate these life-giving elements into their own gardens, enhancing their green spaces with robust, healthy trees.
Monty’s expertise doesn’t stop at tree planting. He delves into the fascinating world of climbers, those plants that gracefully ascend walls and trellises, adding vertical interest and lushness to gardens. He focuses on climbers particularly suited for east-facing walls, which receive gentle morning sunlight but are shaded for the rest of the day. Monty’s recommendations and tips provide practical advice for gardeners looking to maximize their garden’s potential by understanding and utilizing its unique aspects, such as orientation and light conditions. This segment of the episode underscores the blend of art and science inherent in successful gardening, illustrating how thoughtful plant selection and placement can transform a space.
Meanwhile, Nick Bailey takes viewers on a journey into the intriguing realm of lichens. These unique organisms, which are a symbiotic partnership between fungi and algae, thrive in diverse environments, from trees and wood to stone surfaces. Nick explores their biology and ecological significance, shedding light on how lichens can indicate air quality and contribute to biodiversity. His exploration adds a layer of scientific curiosity to the episode, appealing to viewers who enjoy learning about the complex interconnections within nature.
Frances Tophill also brings an international perspective to the show by visiting the vibrant gardens of Barbados. Here, she meets enthusiastic local gardeners who, despite often having limited space, manage to cultivate stunning displays of color, foliage, and world-class flowers. Frances highlights the creativity and ingenuity of these gardeners, showing how they overcome challenges such as space and climate to create beautiful, thriving gardens. Her segment is a testament to the universal appeal and adaptability of gardening, demonstrating that with passion and innovation, beautiful gardens can be created anywhere.
Gardeners World episode 3 2017
In celebration of Gardeners’ World’s 50th anniversary, the episode features a special segment with Rachel de Thame. Rachel reflects on the plant she believes has had the most profound impact on British gardens over the past half-century. Her choice and the accompanying discussion provide a historical perspective, connecting contemporary gardening practices with their roots and evolution. This reflection not only honors the show’s rich legacy but also inspires viewers to appreciate the historical context and enduring trends in gardening.
Throughout the episode, the presenters seamlessly blend practical advice, scientific exploration, and international inspiration. Monty Don’s courtyard garden project and his insights on climbers offer hands-on guidance for viewers eager to enhance their own gardens. Nick Bailey’s lichen exploration introduces an element of natural science, enriching viewers’ understanding of the environment. Frances Tophill’s Barbados adventure showcases the global reach and versatility of gardening, while Rachel de Thame’s anniversary reflection ties the past to the present, celebrating the enduring influence of gardening on British culture.
This episode of Gardeners’ World exemplifies the show’s commitment to fostering a deep appreciation for gardening. It combines Monty’s practical wisdom with Nick’s scientific curiosity, Frances’s international experiences, and Rachel’s historical insights. Together, these elements create a rich, multifaceted viewing experience that educates, inspires, and celebrates the joy of gardening. Whether you are an experienced gardener or a novice, this episode offers a wealth of knowledge and inspiration to help you cultivate your own green paradise.
Pleached walks, tunnels and arbours
Pleaching is a method of training trees to produce a narrow screen or hedge by tying in and interlacing flexible young shoots along a supporting framework. Use this technique to make walks, arbours, tunnels and arches. Pleached walks, tunnels, and arbours are an excellent way to add structure, interest, and privacy to your garden. These living structures are created by training trees or shrubs into a flat, horizontal plane, creating a canopy that can be used as a walkway, tunnel, or arbour.
Choosing the Right Plants
When selecting plants for pleaching, it is important to choose species that are naturally upright and have a dense branching habit. Popular choices include hornbeam, lime, and beech trees, which have a natural tendency to grow straight and tall and respond well to pruning and training.
Training the Trees
Training trees for pleaching can be a time-consuming process, but it is well worth the effort. Start by selecting young trees with straight trunks and a good branching structure. Plant them in a straight line, spaced about 6-8 feet apart, and use stakes and ties to keep them straight as they grow.
As the trees grow, prune the side branches and encourage new growth along the trunk. Use wire or bamboo frames to train the branches into a horizontal plane, taking care not to damage the bark or branches. Once the trees have reached the desired height and width, maintain them with regular pruning and training.
Pleached Walks
Pleached walks are created by training trees into a canopy that forms a natural arbour or tunnel. They are perfect for adding structure and interest to long, straight paths or creating a sense of enclosure in open spaces.
Pleached Tunnels
Pleached tunnels are similar to pleached walks but are typically shorter and more enclosed. They are perfect for creating a sense of mystery and discovery in a garden and can be used to frame a view or highlight a focal point. Pleached tunnels can also be used to create a natural transition between different garden spaces, such as a vegetable garden and a rose garden.
Pleached Arbours
They are created by training trees into a canopy that forms a shaded seating area. They are perfect for creating a secluded, intimate space in a garden and can be used to frame a view or provide a sense of enclosure. Pleached arbours can also be used to create a focal point in a garden, such as a statue or water feature.
Pleached walks, tunnels, and arbours are a beautiful and natural way to add structure, interest, and privacy to your garden. By choosing the right plants, training them carefully, and maintaining them with regular pruning and training, you can create living structures that will enhance your garden for years to come. So, why not give pleaching a try and see the beauty it can bring to your garden?
Planting: Trees and shrubs – Gardeners World episode 3 2017
Planting new trees and shrubs is not a difficult job, but one to get right, if you want your new plants to have the best start in life. The most important considerations are root health, weather, soil conditions and aftercare. Planting trees and shrubs is an excellent way to add beauty, value, and environmental benefits to your garden. Trees and shrubs provide shade, privacy, and a habitat for wildlife, and they can also help prevent soil erosion and reduce noise and air pollution. Here are some tips for planting trees and shrubs in your garden:
Choosing the Right Location
When selecting a location for your trees or shrubs, it is important to consider several factors, such as soil quality, drainage, sunlight, and space. Some trees and shrubs require specific soil types or drainage conditions, while others may need full or partial sunlight to thrive. Additionally, it is important to consider the mature size of the tree or shrub and ensure that it has enough space to grow without interfering with other plants, structures, or utilities.
Preparing the Soil
Before planting your tree or shrub, it is important to prepare the soil to ensure optimal growth and health. Start by digging a hole that is wider and deeper than the root ball of the plant. Loosen the soil in the hole and mix in some organic matter, such as compost or aged manure, to improve soil quality and drainage. Be sure to remove any rocks, weeds, or debris from the soil, as these can interfere with root growth.
Planting the Tree or Shrub
When planting your tree or shrub, be sure to handle it gently to avoid damaging the roots or branches. Carefully remove the plant from its container and loosen any tangled or circling roots. Place the plant in the hole, making sure that the top of the root ball is level with the ground. Fill the hole with soil, tamping it down gently to remove air pockets. Water the plant thoroughly to help settle the soil and encourage root growth.
Mulching and Watering
After planting your tree or shrub, it is important to mulch around the base of the plant to help retain moisture and suppress weeds. Use a layer of organic mulch, such as bark chips or shredded leaves, and spread it evenly around the base of the plant, taking care not to cover the trunk or stems. Water the plant regularly, especially during the first year after planting, to ensure that the soil stays moist and the roots have time to establish.
Planting trees and shrubs is an excellent way to enhance your garden and provide numerous benefits for the environment and wildlife. By choosing the right location, preparing the soil, planting the plant carefully, and providing regular mulching and watering, you can ensure that your trees and shrubs will grow strong and healthy for many years to come. So, why not add a tree or shrub to your garden today and enjoy its beauty and benefits for years to come?
Grow Your Own Tomatoes – Gardeners World episode 3 2017
Growing your own tomatoes is simple and just a couple of plants will reward you with plenty of delicious tomatoes in the summer. There are all kinds of tomatoes to try, from the tiniest cherry types, favourites with children, through to full-flavoured giant beefsteak tomatoes. Tomatoes come in all kinds of colours too. Growing your own tomatoes is a rewarding and delicious way to enjoy fresh, home-grown produce. Tomatoes are easy to grow, and with a few basic tips, you can produce a bountiful crop of juicy, ripe tomatoes in your own backyard. Here’s how to get started:
Choosing the Right Variety
When selecting tomato varieties, it’s important to consider your growing conditions and preferences. Tomatoes come in many sizes, colors, and flavors, from cherry tomatoes to beefsteak varieties. Some are better suited for container gardening, while others require staking or trellising to support their growth. Consider factors such as the amount of sunlight and space available, as well as your desired harvest time and flavor profile, when choosing tomato varieties.
Preparing the Soil
Tomatoes prefer well-drained soil that is rich in organic matter. Prepare your soil by adding compost or well-rotted manure to the planting area. Tomatoes also benefit from the addition of calcium, which can help prevent blossom end rot. You can add crushed eggshells or a commercial calcium supplement to the planting hole to provide this essential nutrient.
Planting the Tomatoes
Tomatoes should be planted after the last frost date in your area. Dig a hole that is deep enough to cover the root ball of the plant and wide enough to allow room for the roots to spread. Place the plant in the hole and fill in with soil, gently tamping it down to remove any air pockets. Water the plant well after planting to help settle the soil and encourage root growth.
Staking and Pruning
Tomatoes require support as they grow to prevent the weight of the fruit from bending or breaking the stems. You can use stakes, cages, or trellises to support your plants. It’s also important to prune your tomato plants regularly to remove any suckers, which are shoots that grow in the joint between the stem and the branch. Pruning helps promote air circulation and can lead to larger, healthier fruit.
Watering and Fertilizing
Tomatoes require regular watering to maintain healthy growth and fruit production. Water deeply and infrequently, allowing the soil to dry out slightly between waterings. Tomatoes also benefit from regular fertilization, particularly with a balanced fertilizer that contains nitrogen, phosphorus, and potassium. Avoid over-fertilizing, which can lead to excess foliage growth at the expense of fruit production.
Growing your own tomatoes is a fun and rewarding way to enjoy fresh, home-grown produce. With the right variety, soil preparation, planting techniques, support, and care, you can produce a bountiful harvest of delicious, juicy tomatoes in your own backyard. So, why not start your own tomato garden today and enjoy the fruits of your labor all season long?
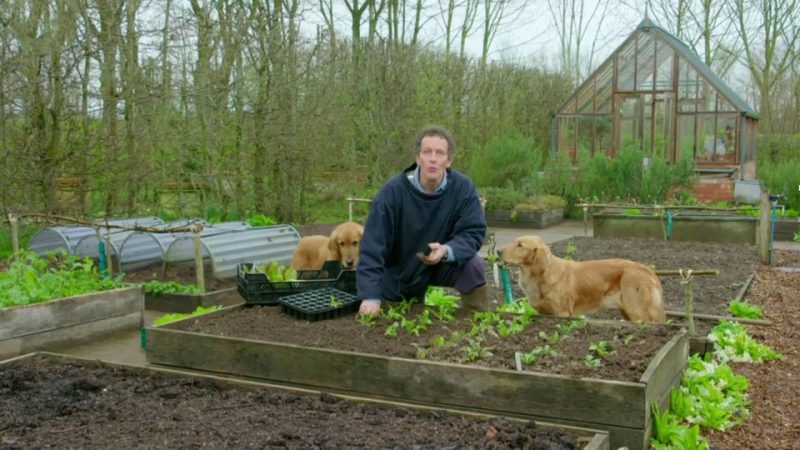
Sowing indoors
Sowing seeds indoors allows tender plants to be started off earlier in the season. When they have grown into young plants, they can be planted outside in the garden or vegetable plot once the weather is warm enough. Sowing seeds indoors is an excellent way to get a head start on your gardening season and ensure healthy, robust plants. By starting your seeds indoors, you can control the environment and provide optimal growing conditions for your plants. Here’s how to get started:
Choosing the Right Seeds
When selecting seeds for indoor sowing, it’s important to choose varieties that are well-suited for indoor growing conditions. Consider factors such as the length of the growing season, the amount of light and space available, and your desired harvest time and flavor profile. Some common seeds for indoor sowing include tomatoes, peppers, herbs, and annual flowers.
Preparing the Soil
Seeds require a well-draining, nutrient-rich soil to grow successfully. Use a high-quality potting mix that is designed for seed starting, or create your own by mixing equal parts of compost, vermiculite, and peat moss. Fill your seed trays or containers with the soil, leaving about 1/4 inch of space at the top.
Sowing the Seeds
Sow the seeds according to the instructions on the seed packet, which will typically include information on the appropriate depth, spacing, and germination temperature. Cover the seeds with a thin layer of soil and water gently to ensure that the soil is moist but not waterlogged. Place the seed trays or containers in a warm, bright location, such as a sunny windowsill or under grow lights.
Maintaining the Environment
To ensure successful germination and healthy growth, it’s important to maintain the proper environment for your seeds. Keep the soil moist but not waterlogged, and use a misting spray bottle or a bottom-watering tray to avoid disturbing the delicate seeds. Provide ample light, either by placing the trays near a sunny window or by using artificial grow lights. Keep the temperature warm, ideally between 60 and 70 degrees Fahrenheit, to promote germination.
Transplanting the Seedlings
Once your seedlings have grown to a size where they have outgrown their seedling trays, or have developed their first set of true leaves, they are ready to be transplanted into larger containers or into the ground. Be sure to harden off the seedlings gradually by gradually exposing them to outdoor temperatures and sunlight before planting them outdoors.
Sowing seeds indoors is a great way to get a head start on your gardening season and ensure healthy, robust plants. With the right seeds, soil preparation, sowing techniques, and environment, you can grow a bountiful crop of vegetables, herbs, and flowers in your own home. So, why not try your hand at indoor seed sowing and enjoy the satisfaction of growing your own plants from seed?
How to grow parsnips
A roast dinner isn’t complete without roast parsnips – and they add a whole new dimension to stews and casseroles too. The good news is parsnips are easy to grow, need little maintenance and can be left in the garden until you’re ready to use them. Sow in spring and you’ll have parsnips in the autumn. Parsnips are a sweet and delicious root vegetable that are easy to grow in your own garden. With a few basic tips, you can grow a bountiful crop of parsnips that will provide a tasty addition to your meals throughout the winter months. Here’s how to get started:
Preparing the Soil
Parsnips prefer a well-drained, sandy soil that is rich in organic matter. Before planting, prepare the soil by digging it deeply and adding compost or well-rotted manure. Remove any rocks, weeds, or debris from the soil to ensure that the parsnips have room to grow.
Sowing the Seeds
Parsnip seeds are best sown directly in the garden bed in early spring, about 2-3 weeks before the last expected frost date. Sow the seeds about 1/2 inch deep and 2-3 inches apart, in rows that are spaced 12-18 inches apart. Cover the seeds with soil and water gently to ensure that the soil is moist but not waterlogged.
Thinning and Weeding
Once the parsnips have sprouted, thin them to about 3-4 inches apart to allow them enough room to grow. Weeds should also be removed regularly to ensure that the parsnips have access to water and nutrients. Be careful not to disturb the roots of the parsnips when weeding.
Watering and Fertilizing
Parsnips require consistent moisture to grow successfully. Water the plants deeply once a week, or more frequently during hot, dry weather. Avoid overwatering, as this can cause the roots to rot. Parsnips do not require heavy fertilization, but a balanced fertilizer can be applied at the time of planting or during the growing season if necessary.
Harvesting
Parsnips are ready to harvest when they reach maturity, which is usually about 120-180 days after planting. They can be left in the ground until after the first frost, which can enhance their flavor. To harvest, loosen the soil around the parsnip with a fork or trowel, taking care not to damage the roots. Gently pull the parsnip out of the ground by the foliage, and brush off any excess soil.
Storing – Gardeners’ World episode 3 2017
Parsnips can be stored in a cool, dark place, such as a root cellar or refrigerator, for several months. Remove any green shoots or foliage before storing, as these can cause the parsnips to become bitter. Alternatively, parsnips can be blanched and frozen for later use.
Growing parsnips is a rewarding and delicious way to add a sweet and tasty root vegetable to your meals. With the right soil preparation, seed sowing, watering and fertilizing, harvesting, and storing techniques, you can grow a bountiful crop of parsnips in your own garden. So, why not try your hand at growing parsnips and enjoy the satisfaction of harvesting your own delicious and nutritious produce?
In Gardeners World episode 3 2017 you will find answers to this questions:
- How to plant bare root trees?
- What are the best plants for east-facing walls?
- How to create pleached walks, tunnels, and arbours?
- How to grow your own tomatoes?
- How to sow seeds indoors?
- How to grow parsnips in the garden?