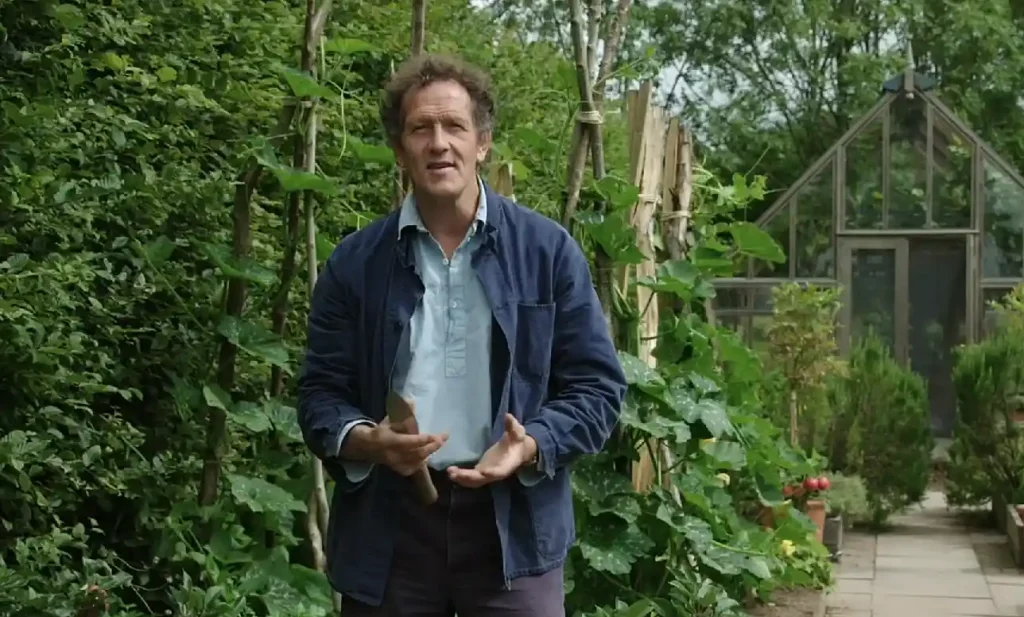
In the engaging episode Gardeners World episode 11 2017, Monty Don shares insightful advice on cultivating herbs that thrive in shaded areas, and surprises viewers with his unique choice for summer container plants – the tropical banana. This episode also features a special segment where Monty takes viewers on an intriguing journey to Chatsworth House. Here, he delves into the rich history of its sprawling grounds and gardens, while also shedding light on the challenges faced in organizing Chatsworth’s inaugural RHS flower show in June 2017.
Additionally, the episode spotlights Flo Headlam’s visit to an innovative school where gardening is a fundamental part of the educational curriculum, inspiring young minds and fostering a connection with nature. Nick Bailey contributes to the episode with a practical demonstration, showing viewers the steps to construct a pond in just a weekend, a project that adds beauty and biodiversity to any garden.
The journey continues with an introduction to an extraordinary garden managed by a dedicated head gardener on a unique platform – a barge. This segment explores the fascinating aspects of barge gardening, revealing how certain plants adapt and flourish in such unusual conditions, offering viewers a glimpse into the creative possibilities of gardening in limited and unconventional spaces.
In Gardeners World episode 11 2017:
How to grow broccoli
Broccoli has had a resurgence in popularity – for its high vitamin content and anti-cancer agents. It is a fast-growing and easy-to-grow crop, producing bluish-green heads that are harvested in the summer or autumn, depending on the time it is sown. The sprouting types are hardy and overwintered for harvest in spring, filling the gap between sprouts and spring cabbage. This is a nutritious and delicious vegetable that can be grown in your own garden. Broccoli belongs to the brassica family, which includes cabbage, cauliflower, kale, and Brussels sprouts. Broccoli is a cool-season crop that can tolerate light frost, but not extreme heat. Here are some tips on how to grow broccoli successfully.
1. Choose the right variety. There are many types of broccoli, such as sprouting, heading, purple, and Romanesco. Some varieties are more heat-tolerant or cold-hardy than others. Check the seed packet or plant label for information on the best time to plant and harvest your broccoli.
2. Prepare the soil. Broccoli prefers rich, well-drained soil with a pH of 6.0 to 7.0. You can amend the soil with compost or organic fertilizer before planting to improve its fertility and drainage. Broccoli also needs plenty of sun, so choose a spot that gets at least six hours of direct sunlight per day.
3. Sow the seeds or transplant the seedlings. You can start broccoli seeds indoors about six to eight weeks before the last frost date in your area, or buy transplants from a nursery. Transplant the seedlings outdoors when they are four to six weeks old, or when the soil temperature is at least 50°F (10°C). Space the plants 18 to 24 inches (45 to 60 cm) apart in rows that are 24 to 36 inches (60 to 90 cm) apart.
4. Water and mulch. Broccoli needs regular watering to keep the soil moist but not soggy. Water deeply and evenly once or twice a week, depending on the weather and soil conditions. You can also apply a layer of organic mulch around the plants to conserve moisture and suppress weeds.
5. Fertilize and protect. Broccoli is a heavy feeder and may need additional fertilizer during the growing season. You can apply a balanced liquid fertilizer every two to four weeks, following the package directions. You can also protect your broccoli from pests and diseases by using row covers, netting, or organic pesticides.
6. Harvest and enjoy. Broccoli is ready to harvest when the heads are firm and green, and before the yellow flowers start to open. Cut the main head with a sharp knife, leaving about six inches (15 cm) of stem attached. You can also harvest the smaller side shoots that will form after the main head is cut. Store your broccoli in the refrigerator for up to a week, or blanch and freeze it for longer storage.
Broccoli is a versatile vegetable that can be eaten raw or cooked in various ways. You can enjoy it in salads, soups, stir-fries, casseroles, or simply steamed with some butter and lemon juice. Growing your own broccoli is rewarding and satisfying, as you can enjoy fresh and healthy produce from your own backyard.
Growing herbs – Gardeners World episode 11 2017
A continuous medley of aromatic, fresh herbs are easy to grow and harvest, adding vibrant flavours and texture to any meal. Growing herbs is a rewarding and fun hobby that can enhance your cooking and your health. Herbs are plants that have aromatic or flavorful leaves, stems, flowers, seeds or roots. They can be used fresh or dried, and they can add flavor, color and aroma to your dishes. Some herbs also have medicinal properties that can help with various ailments.
There are many types of herbs to choose from, depending on your preferences and needs. Some common herbs that are easy to grow include basil, mint, parsley, rosemary, thyme, oregano and cilantro. You can grow herbs in pots, containers, window boxes or in the ground. You can also grow them indoors or outdoors, depending on the climate and the season.
To grow herbs successfully, you need to provide them with the right conditions. Most herbs prefer a sunny location with well-drained soil. They also need regular watering and pruning to keep them healthy and productive. You can fertilize your herbs with organic matter or compost once or twice a year. You can harvest your herbs as needed throughout the growing season, but avoid taking more than a third of the plant at a time.
Growing herbs is a great way to enjoy fresh and flavorful ingredients in your kitchen. You can also use them to make teas, oils, vinegars, salves and other products. Herbs can also attract beneficial insects and pollinators to your garden. By growing your own herbs, you can save money, reduce waste and improve your well-being.
How to grow mint
Mint is a perennial herb grown for its leaves. They are wonderful infused in hot water to make a refreshing tea, chopped and added to many dishes, or used to make mint sauce. There are many different varieties of mint to choose from with leaves that smell completely different. Not all are good for culinary use, so choose what you grow carefully. Mint is a popular herb that can be used for cooking, tea, or aromatherapy. Mint is easy to grow and can thrive in pots or in the ground. Here are some tips on how to grow mint successfully.
- Choose a variety of mint that suits your needs. There are many types of mint, such as peppermint, spearmint, chocolate mint, pineapple mint, and more. Each one has a different flavor and aroma, so pick the one that you like best.
- Plant mint in a sunny spot with moist, well-drained soil. Mint prefers full sun or partial shade, and likes moist but not soggy soil. You can plant mint from seeds, cuttings, or transplants. If you plant from seeds, sow them about 1/4 inch deep and keep the soil moist until they germinate. If you plant from cuttings, take a 4-inch stem from an existing plant and remove the lower leaves. Insert the stem into a pot of moist soil and keep it in a bright spot until it roots. If you plant from transplants, dig a hole twice as wide as the root ball and place the plant in it. Fill the hole with soil and water well.
- Water and fertilize your mint regularly. Mint needs regular watering to keep the soil moist but not waterlogged. You can also add some organic fertilizer or compost to the soil every few weeks to boost its growth. Mint is a fast-growing plant that can spread quickly, so you may need to prune it back occasionally to keep it in shape.
- Harvest and use your mint. You can harvest mint leaves anytime by pinching or cutting them off the stems. You can use fresh mint leaves for cooking, tea, or aromatherapy, or you can dry them for later use. To dry mint leaves, tie them in small bundles and hang them upside down in a dark, dry place until they are crisp. Then store them in an airtight container away from light and heat.
Hedges: pruning times
Hedges require formative pruning on planting, plus maintenance trimming to keep them within bounds. Pruning times vary depending on the type of hedge. If you have hedges in your garden, you may wonder when and how to prune them. Pruning hedges is important to keep them healthy, dense, and compact. However, different types of hedges may require different pruning times and techniques. Here are some general tips to help you trim your hedges properly.
First, you need to know whether your hedges are deciduous or evergreen. Deciduous hedges lose their leaves in winter, while evergreen hedges keep them all year round. Deciduous hedges need formative pruning in winter, just after planting and for the first two years. This means cutting back the stems to encourage branching and bushy growth. Evergreen hedges need formative pruning in spring, after planting and for the first two years.
After the formative pruning, both deciduous and evergreen hedges need maintenance pruning to keep their shape and size. Deciduous hedges should be pruned once a year in summer, while evergreen hedges should be pruned twice a year in summer. Some formal evergreen hedges, such as box or privet, may need three cuts a year.
When pruning your hedges, you should use sharp and well-lubricated tools, such as hand-held shears or electric or petrol hedge trimmers. You should also wear safety goggles and gloves, and avoid using powered tools above shoulder height. If you use an electric hedge trimmer, make sure it is connected to a residual current device (RCD) and do not use it in damp conditions.
Formal hedges should be slightly tapered on both sides so that the base is wider than the top and light can reach the bottom of the hedge. This is called cutting the hedge to a batter. To achieve a straight and even hedge, you can use a horizontal string tied between two canes as a guide for the top, and stakes pushed into the ground as a guide for the sides.
Informal and flowering hedges do not need strict shaping, but they still benefit from regular trimming to remove old or dead stems and encourage new growth and flowering. The best time to prune these hedges is immediately after flowering, which may vary depending on the species.
One thing to consider before pruning any hedge is the potential for nesting birds. It is an offence under the Wildlife & Countryside Act 1981 to damage or destroy the nest of any wild bird while it is in use or being built. The bird nesting season is usually considered to run from March to August, so you should check carefully for any signs of bird activity before pruning your hedges.
Pruning hedges may seem like a daunting task, but with some basic knowledge and proper tools, you can keep your hedges looking neat and healthy throughout the year.
Wildlife ponds – Gardeners World episode 11 2017
A pond is an attractive feature in any garden and, with a little thought about its design and construction, can also be a haven for wildlife. During the past century, nearly 70 percent of ponds have been lost from the UK countryside, meaning garden ponds and water features have an increased importance for wildlife. Wildlife ponds are small bodies of water that attract and support various kinds of animals and plants. They can be created in gardens, parks, or other green spaces to enhance biodiversity and provide habitats for wildlife. Wildlife ponds can also help with water conservation, pest control, and pollination. Some of the benefits of wildlife ponds are:
– They attract birds, frogs, insects, and other creatures that can help balance the ecosystem and reduce pests.
– They provide a source of water for wildlife, especially during dry periods.
– Wildlife ponds create a natural focal point and add beauty to the landscape.
– They offer opportunities for learning and observing nature.
To create a wildlife pond, you will need a suitable location, a container or liner, some water plants, and some rocks or logs. You will also need to maintain the pond by keeping it clean, aerated, and free of invasive species. You can find more information and tips on how to create and care for a wildlife pond on various websites and books.
