In Gardeners World episode 12 2017, there is an hour of gardens and gardening tonight, not only from Longmeadow but also the brand new RHS Chatsworth Flower Show. Set against a majestic backdrop, Joe Swift, Carol Klein and Adam Frost bring an exclusive look at the show. If you love gardens and gardening, you will enjoy Gardeners World episode 12 2017. This episode features not only Monty Don’s tips and tricks from Longmeadow, but also a special report from the new RHS Chatsworth Flower Show. Join Joe Swift, Carol Klein and Adam Frost as they explore the stunning gardens and exhibits at this spectacular event.
You will see how Jo Thompson created a show garden with a difference, how Carol discovered plants that changed the history of gardening, and how Arit Anderson learned about a garden designed for the future. Plus, Monty gives you some useful advice on roses, fuchsias, potatoes, tomatoes, agapanthus and garlic. And don’t miss the fascinating segment on red lily beetle, a pest that can ruin your lilies and fritillaries. Gardeners World episode 12 2017 is an hour of gardening inspiration and information that you won’t want to miss.
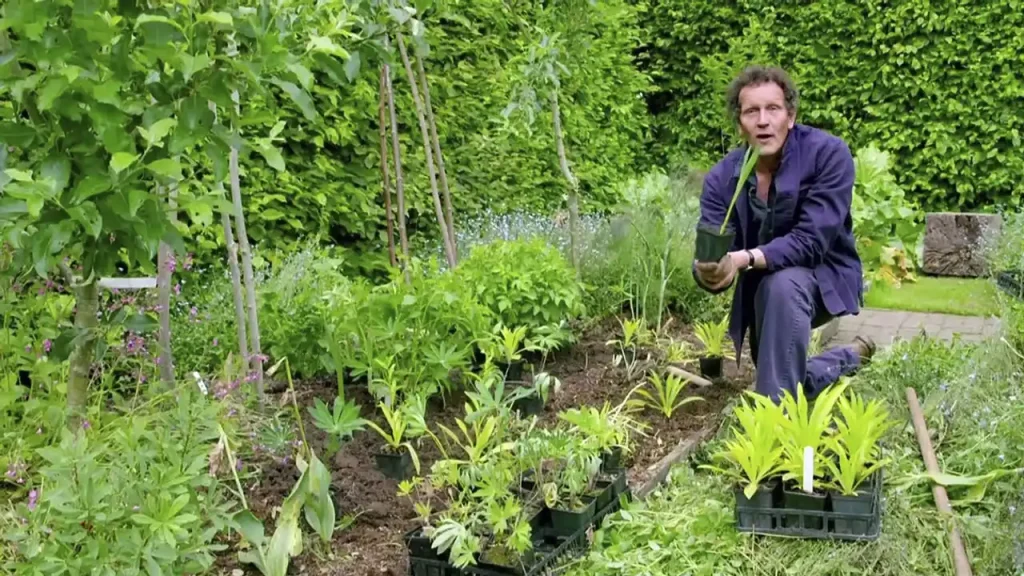
We meet leading designer Jo Thompson as she prepares her show garden with a difference. In the Floral Pavilion, Carol finds pioneering plants that have shaped the gardens of today and garden designer Arit Anderson looks to the future – meeting the team behind a garden built for the changing climate. Back at Longmeadow, Monty provides the ubiquitous jobs for the weekend.
Gardeners World episode 12 2017 tips:
Rose
Roses are one of the most popular garden plants. These beauties come in a range of colours, many with scented blooms, and they can be grown in borders, containers, over arches, pergolas and as ground cover. They are easy to grow and live for a long time, if looked after. They have been cultivated for thousands of years and come in a variety of shapes, colors and fragrances. In this blog post, I will share some tips on how to grow and care for roses in your own backyard.
First, you need to choose the right type of rose for your climate and soil. There are many kinds of roses, such as hybrid teas, floribundas, climbers, shrub roses and miniatures. Each one has different characteristics and needs. For example, hybrid teas are the classic long-stemmed roses that are ideal for cutting and displaying in vases. Floribundas are bushy roses that produce clusters of flowers throughout the season. Climbers are roses that can grow up to 20 feet tall and cover walls, fences or trellises. Shrub roses are hardy and low-maintenance roses that can tolerate a range of conditions. Miniatures are small roses that are perfect for containers or borders.
Second, you need to prepare the planting site. Roses prefer a sunny location with well-drained soil that is rich in organic matter. You can improve the soil by adding compost, manure or peat moss. You should also test the soil pH and adjust it if necessary. Roses prefer a slightly acidic soil with a pH of 6.0 to 6.5. You can use lime to raise the pH or sulfur to lower it.
Third, you need to plant the roses properly. You can buy roses as bare-root plants or as potted plants. Bare-root plants are dormant plants that have no soil around their roots. They are usually cheaper and easier to transport than potted plants. However, they need to be planted as soon as possible after purchase. Potted plants are plants that are already growing in containers. They are more expensive and heavier than bare-root plants, but they can be planted at any time of the year.
To plant a bare-root rose, you need to soak the roots in water for several hours before planting. Then, you need to dig a hole that is wide and deep enough to accommodate the roots. You should also create a small mound of soil in the center of the hole and spread the roots over it. Next, you need to fill the hole with soil and water well. You should also mound some soil around the base of the plant to protect it from frost.
To plant a potted rose, you need to remove the plant from the container and gently loosen the root ball. Then, you need to dig a hole that is slightly larger than the root ball and place the plant in it. Next, you need to fill the hole with soil and water well.
Fourth, you need to care for your roses regularly. Roses need water, fertilizer, pruning and protection from pests and diseases. You should water your roses deeply once or twice a week, depending on the weather and soil conditions. You should also mulch around your roses to conserve moisture and prevent weeds.
Fertilize your roses once a month during the growing season with a balanced fertilizer that is specially formulated for roses. You should prune your roses in late winter or early spring to remove dead, diseased or damaged branches and to shape the plant. You should also deadhead your roses regularly to encourage more blooms. Protect your roses from pests and diseases by inspecting them frequently and using organic or chemical controls as needed.
By following these tips, you can enjoy beautiful roses in your garden for years to come.
Fuchsia – How to Plant Fuchsia – Gardeners World episode 12 2017
Fuchsias are grown for their very attractive, usually pendent flowers that are borne more or less continuously from summer to autumn. They are useful in summer-bedding schemes, containers or in the ground. Some fuchsias are hardy enough to be used as hedges and in permanent plantings. Fuchsia is a beautiful flowering plant that comes in many colors and varieties. It can grow as a shrub, a trailing plant, or a hanging basket. Fuchsia is easy to care for and can bloom from spring to fall. Here are some tips on how to plant fuchsia in your garden or patio.
Choose the Right Location
Fuchsia likes partial shade and moist soil. Avoid planting it in full sun or in dry areas. Fuchsia can tolerate some frost, but not extreme cold. If you live in a cold climate, you may want to bring your fuchsia indoors during winter or cover it with mulch.
Prepare the Soil
Fuchsia prefers rich, well-drained soil that is slightly acidic. You can add some compost or peat moss to improve the soil quality and lower the pH. You can also use a balanced fertilizer every two weeks during the growing season to boost the growth and flowering of your fuchsia.
Plant the Fuchsia
You can buy fuchsia plants from nurseries or online. You can also grow fuchsia from seeds or cuttings. If you are planting fuchsia in the ground, dig a hole twice as wide and deep as the root ball of your plant. Place the plant in the hole and fill it with soil. Press gently and water well. If you are planting fuchsia in a container, choose a pot that is at least 12 inches in diameter and has drainage holes. Fill the pot with potting mix and plant your fuchsia as above. Water well and place the pot in a shady spot.
Care for Your Fuchsia
Fuchsia needs regular watering and pruning to thrive. Water your fuchsia when the top inch of soil feels dry. Do not overwater or let the soil get soggy. Prune your fuchsia in early spring to remove dead or damaged branches and shape the plant. You can also pinch off the tips of new growth to encourage bushiness and more flowers. Remove faded flowers to prolong the blooming period. Fuchsia is a stunning plant that can add color and charm to your garden or patio. Follow these simple steps to plant and care for your fuchsia and enjoy its beauty for months.
Potato and tomato blight – Gardeners World episode 12 2017
Potato and tomato blight, properly called late blight, is a disease of the foliage and fruit or tubers of tomatoes and potatoes, causing rotting. It is most common in wet weather. Potato and tomato blight is a common fungal disease that affects both crops. It is caused by a pathogen called Phytophthora infestans, which can spread rapidly in wet and humid conditions. Blight can cause severe losses in yield and quality, as well as spoilage of stored tubers and fruits.
Symptoms of blight include brown or black spots on the leaves, stems and fruits, which may be surrounded by a white fuzzy growth. The spots may merge and cause the plant tissue to rot and collapse. The infected fruits may also develop a brown or grey discoloration and a bitter taste.
To prevent blight, it is important to practice good crop hygiene and rotation. Avoid planting potatoes and tomatoes in the same area for at least four years, and remove any infected plants or debris from the field. Use certified disease-free seeds and transplants, and avoid overhead irrigation that can create favorable conditions for the fungus. You can also apply fungicides to protect your plants from infection, but make sure to follow the label instructions and regulations.
Blight is a serious threat to potato and tomato growers, but it can be managed with proper care and attention. By following these tips, you can reduce the risk of blight and enjoy healthy and productive crops.
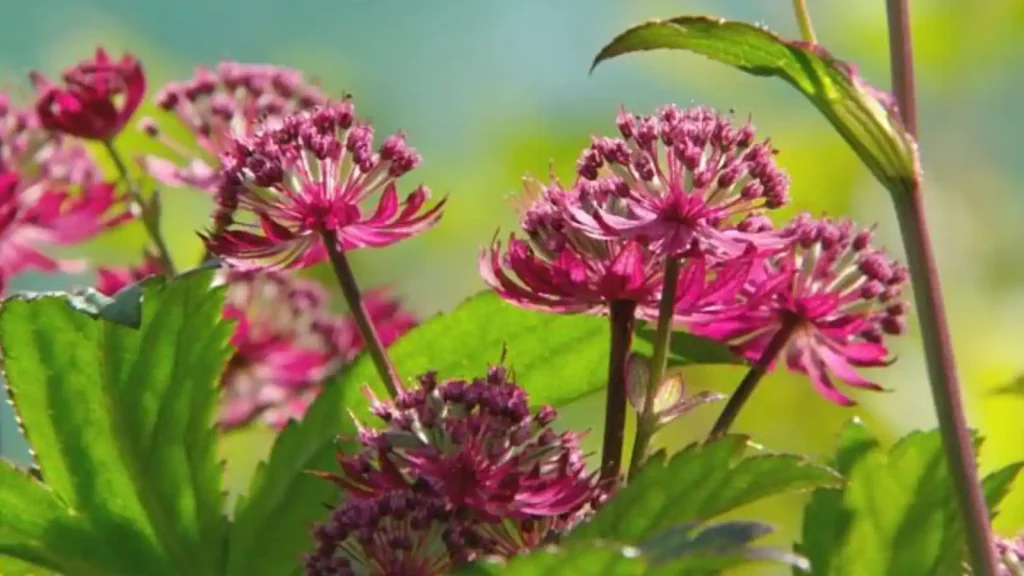
Agapanthus
Agapanthus (African lily) are summer-flowering perennial plants, grown for their showy flowers, commonly in shades of blue and purple, but also white and pink. They thrive in any well-drained, sunny position in the garden, or grow these beauties in containers. The Agapanthus, often referred to as the African Lily, is a perennial plant that graces the warm seasons with its radiant blooms. It is particularly renowned for the vibrant display of its flower heads, which typically manifest in a palette of enchanting blues and purples. However, nature’s variety allows for an array of other shades, including the purity of white and the delicacy of pink.
These captivating plants are remarkably resilient and have an affinity for well-drained soil, effortlessly thriving in such conditions. They prefer to bask in a sunny position within the garden, where they can fully absorb the day’s warmth and light to support their growth and vitality. Their love for sunlight makes them a perfect addition to any garden space that receives generous sunlight throughout the day.
Moreover, the versatility of the Agapanthus extends beyond garden beds. These floral gems also adapt well to containers, offering an excellent solution for those with limited garden space or those who desire to add a touch of elegance to their patios, balconies, or terraces. With their enchanting flowers swaying in the breeze, the Agapanthus truly embodies a blend of rugged resilience and delicate beauty, making it a cherished addition to any outdoor space.
How to grow garlic – Gardeners World episode 12 2017
Not only has the use of garlic in the kitchen increased dramatically in recent years but also the number of gardeners producing their own crop. Garlic is a rewarding, easy-to-grow crop as long as it is grown on well-drained soils. Garlic is a delicious and versatile ingredient that can add flavor and health benefits to many dishes. But did you know that you can grow your own garlic at home? It’s easy and rewarding, and you’ll get to enjoy fresh garlic all year round. Here are the steps to grow garlic in your garden or in a pot.
Choose the right variety
There are two main types of garlic: hardneck and softneck. Hardneck garlic has a stiff stem that produces a flower stalk called a scape. It has fewer but larger cloves and a more complex flavor. Softneck garlic has a flexible stem that can be braided. It has more but smaller cloves and a milder flavor. Softneck garlic also stores better than hardneck garlic.
The type of garlic you choose depends on your climate and preference. Hardneck garlic is more suited for cold climates, while softneck garlic is more adaptable to different conditions. You can also experiment with different varieties of garlic, such as purple, white, or elephant garlic.
Plant the cloves
The best time to plant garlic is in the fall, about six to eight weeks before the first frost. This will give the garlic enough time to develop roots before winter. You can also plant garlic in the spring, but you’ll get smaller bulbs.
To plant garlic, you’ll need to break apart the bulbs into individual cloves. Choose the largest and healthiest cloves and discard any that are damaged or diseased. You’ll need about one bulb for every 10 cloves.
Prepare a sunny spot in your garden with well-drained soil that is rich in organic matter. You can also use a large pot with drainage holes and potting mix. Plant the cloves about 4 inches apart and 2 inches deep, with the pointed end facing up. Cover them with soil and water well.
Care for the plants
Garlic doesn’t need much maintenance, but it does need some attention. Here are some tips to care for your garlic plants:
– Water regularly, but not too much. Garlic likes moist but not soggy soil. Water when the top inch of soil feels dry, and stop watering when the leaves start to yellow.
– Weed often, but gently. Garlic doesn’t like competition from weeds, so keep your garden or pot weed-free. Be careful not to damage the garlic roots when weeding.
– Fertilize monthly, but not too much. Garlic benefits from some extra nutrients, especially nitrogen. You can use a balanced organic fertilizer or compost tea once a month until the scapes appear.
– Harvest the scapes, but not all of them. If you’re growing hardneck garlic, you’ll see curly flower stalks emerge from the center of the plant in late spring or early summer. These are called scapes, and they’re edible and delicious. You can cut them off when they’re about 10 inches long and use them like garlic or green onions. This will also help the plant focus its energy on producing bigger bulbs. However, you can leave some scapes on the plant if you want to collect seeds for next year.
Harvest the bulbs
The best time to harvest garlic is when the leaves start to turn brown and die back, usually in mid to late summer. Don’t wait too long, or the bulbs will split and spoil.
To harvest garlic, gently loosen the soil around the plant with a fork or spade and pull up the bulb by the stem. Shake off any excess soil and inspect the bulb for any signs of damage or disease. Cut off the roots and trim the stem to about an inch above the bulb.
Cure and store
Before you can use or store your garlic, you need to cure it first. Curing is a process that allows the garlic to dry out and develop its flavor and shelf life. To cure garlic, hang it in bunches or lay it on racks in a cool, dry, dark, and well-ventilated place for about two to four weeks. Avoid direct sunlight or moisture, which can cause mold or sprouting. Once cured, you can store your garlic in a mesh bag, a paper bag, or a basket in a cool, dry, dark place for up to six months. You can also braid softneck garlic into decorative wreaths or strings.
Enjoy your homegrown garlic!
You’ve just learned how to grow your own garlic at home. Now you can enjoy fresh garlic anytime you want and use it in your favorite recipes. Garlic is not only tasty but also good for your health, as it has antibacterial, antiviral, anti-inflammatory, and antioxidant properties. So go ahead and plant some garlic today!
What is red lily beetle?
Lily beetle and its larvae are leaf-eating insects of lilies and fritillaries. The adult beetles are very occasionally found on other plants but lilies and fritillaries are the only plants on which eggs are laid and the grubs develop. Apart from spoiling the plants’ appearance, attacks in early summer can result in undersized bulbs developing, which may not flower next year. Lily beetle has become widespread in the UK over the past three decades.